
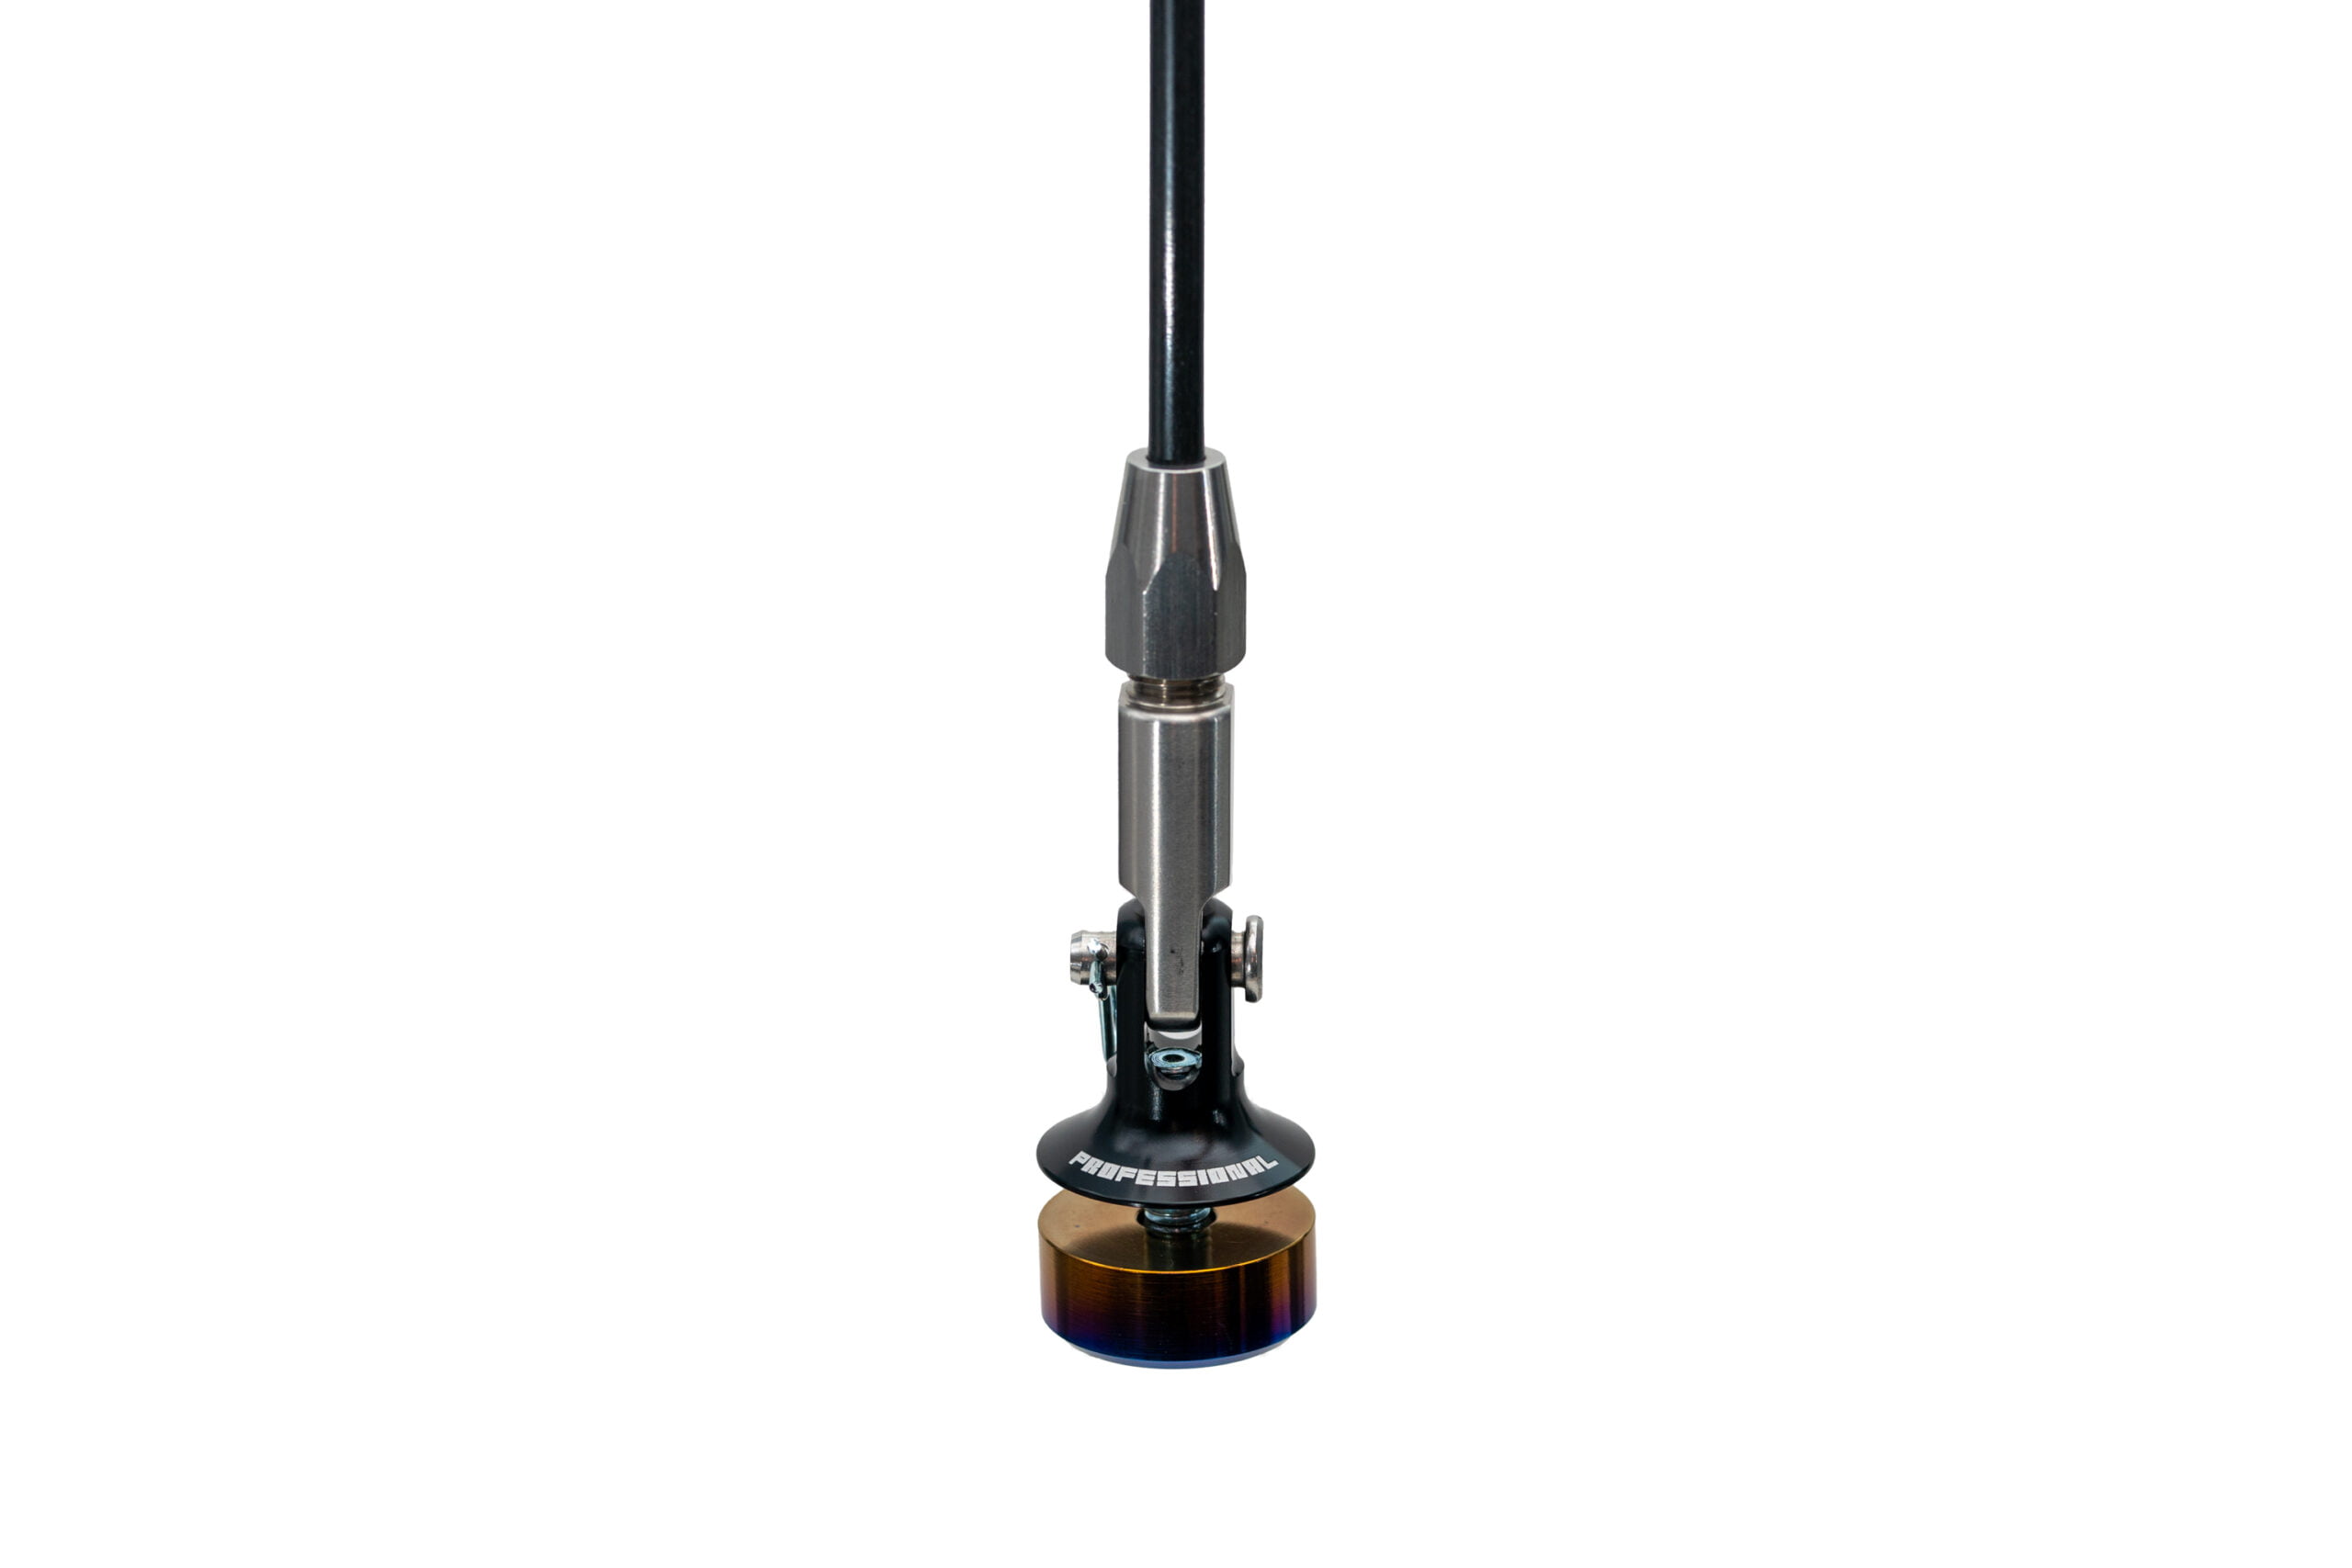


Description
Why We Built These Splitter Support Rods
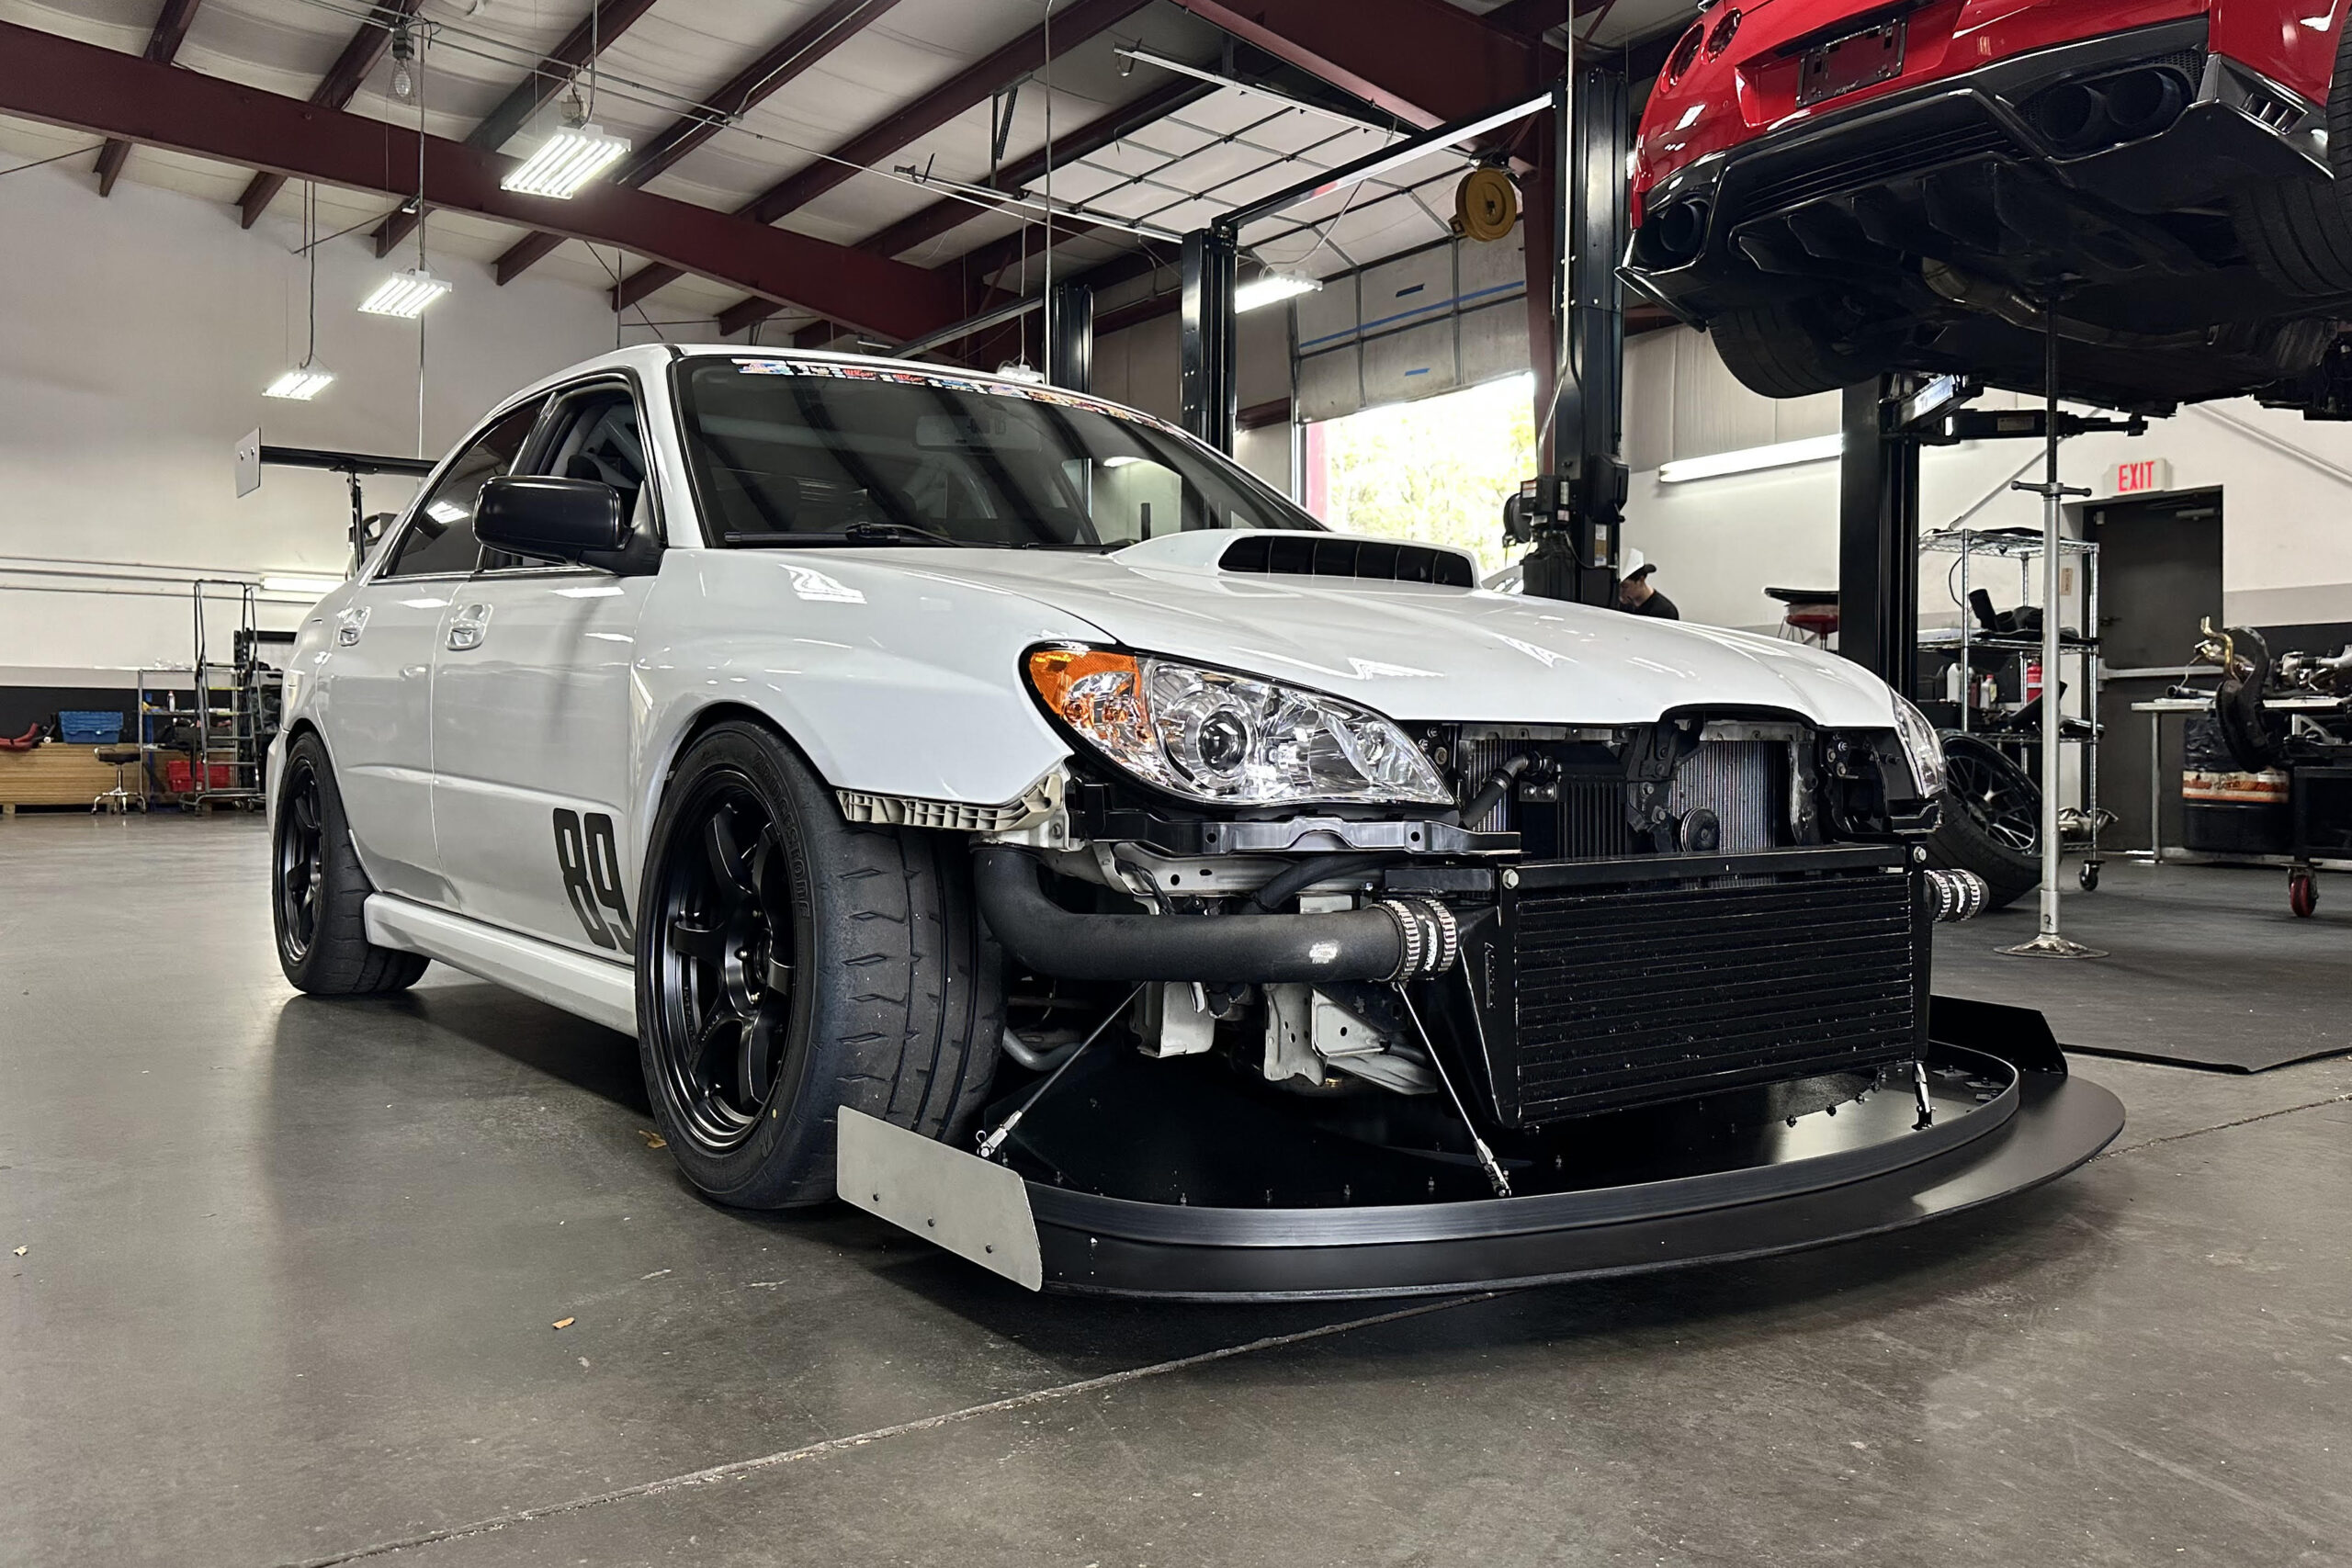
If you have ever watched a splitter support rod bend after a curb strike, you already understand the tradeoff. Your splitter needs enough support to stay steady under aerodynamic load, but a completely rigid link can send impact loads into the rods, splitter blade, or chassis mounting points.
Cables can move out of the way, but that movement can also let the splitter flutter. We wanted a third option: a support that holds the blade where it belongs during normal aerodynamic loading, while still having some give when the splitter meets the track.
Professional Awesome Splitter Support Rods use reinforced fiber rods that are rigid enough to resist flutter, but can flex and return toward their original position during many impacts. Nothing in a loaded aero system is impact-proof, but this controlled flexibility can make the system more forgiving than a completely rigid link.
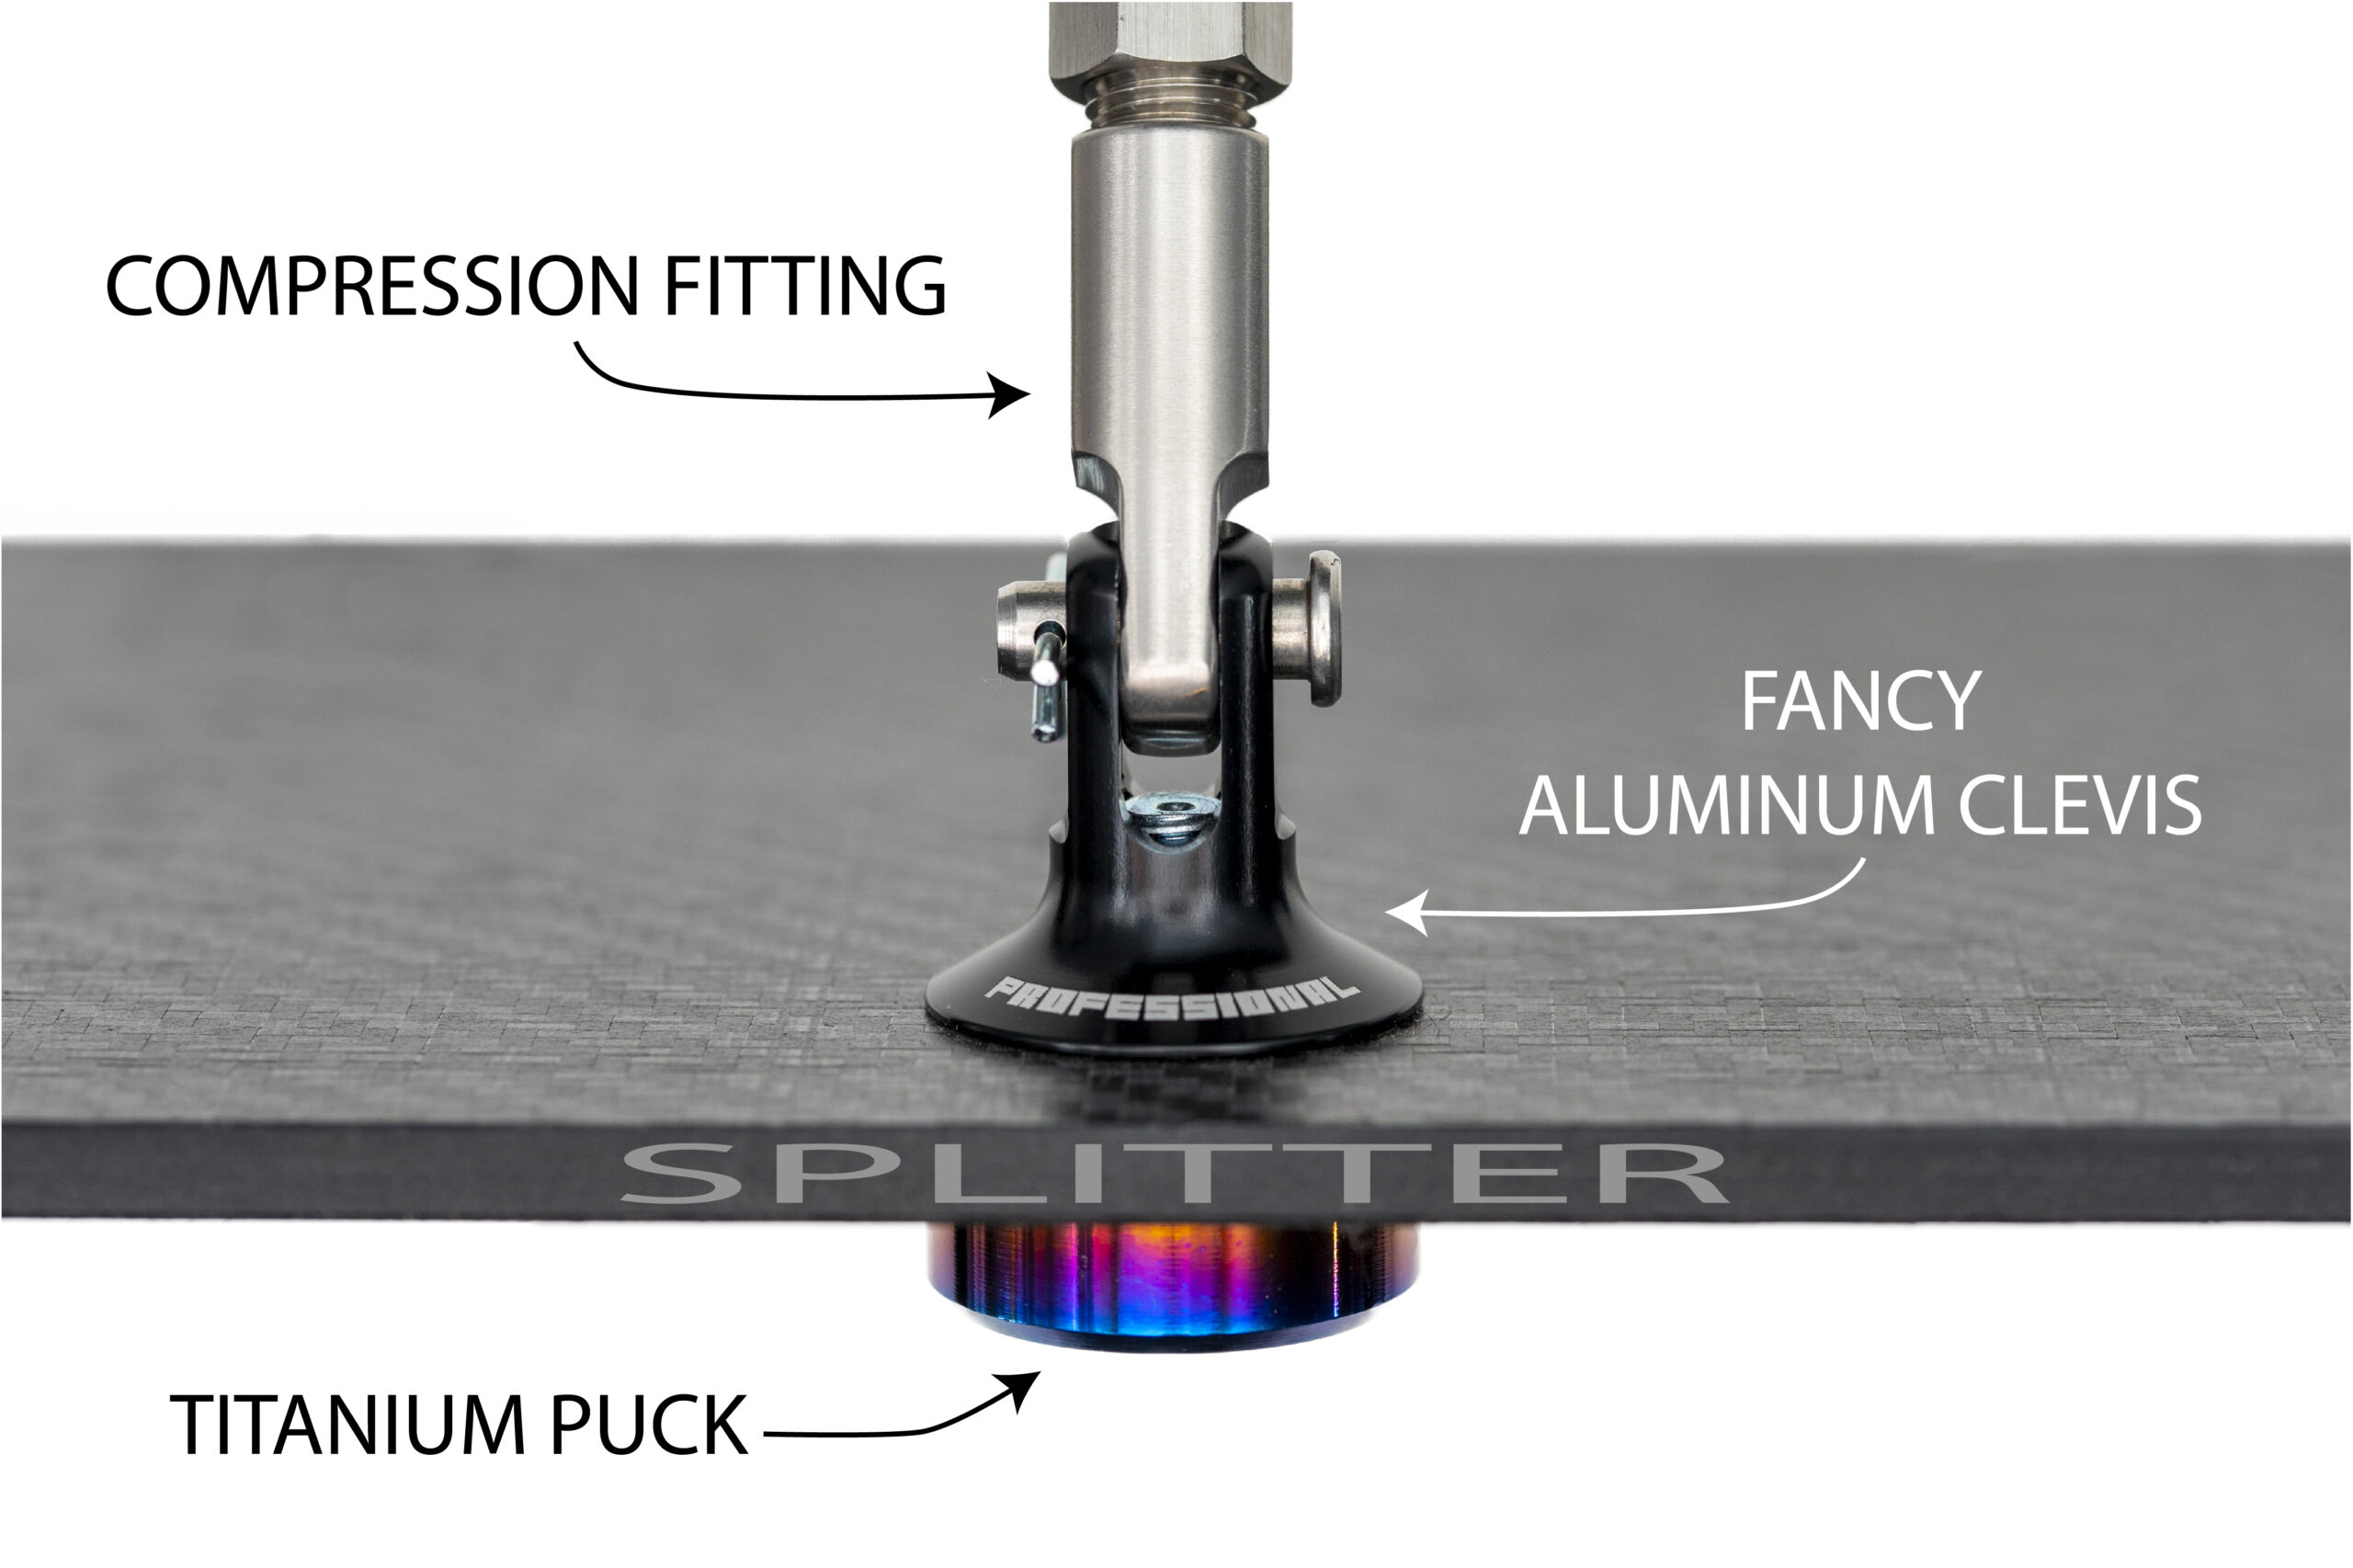
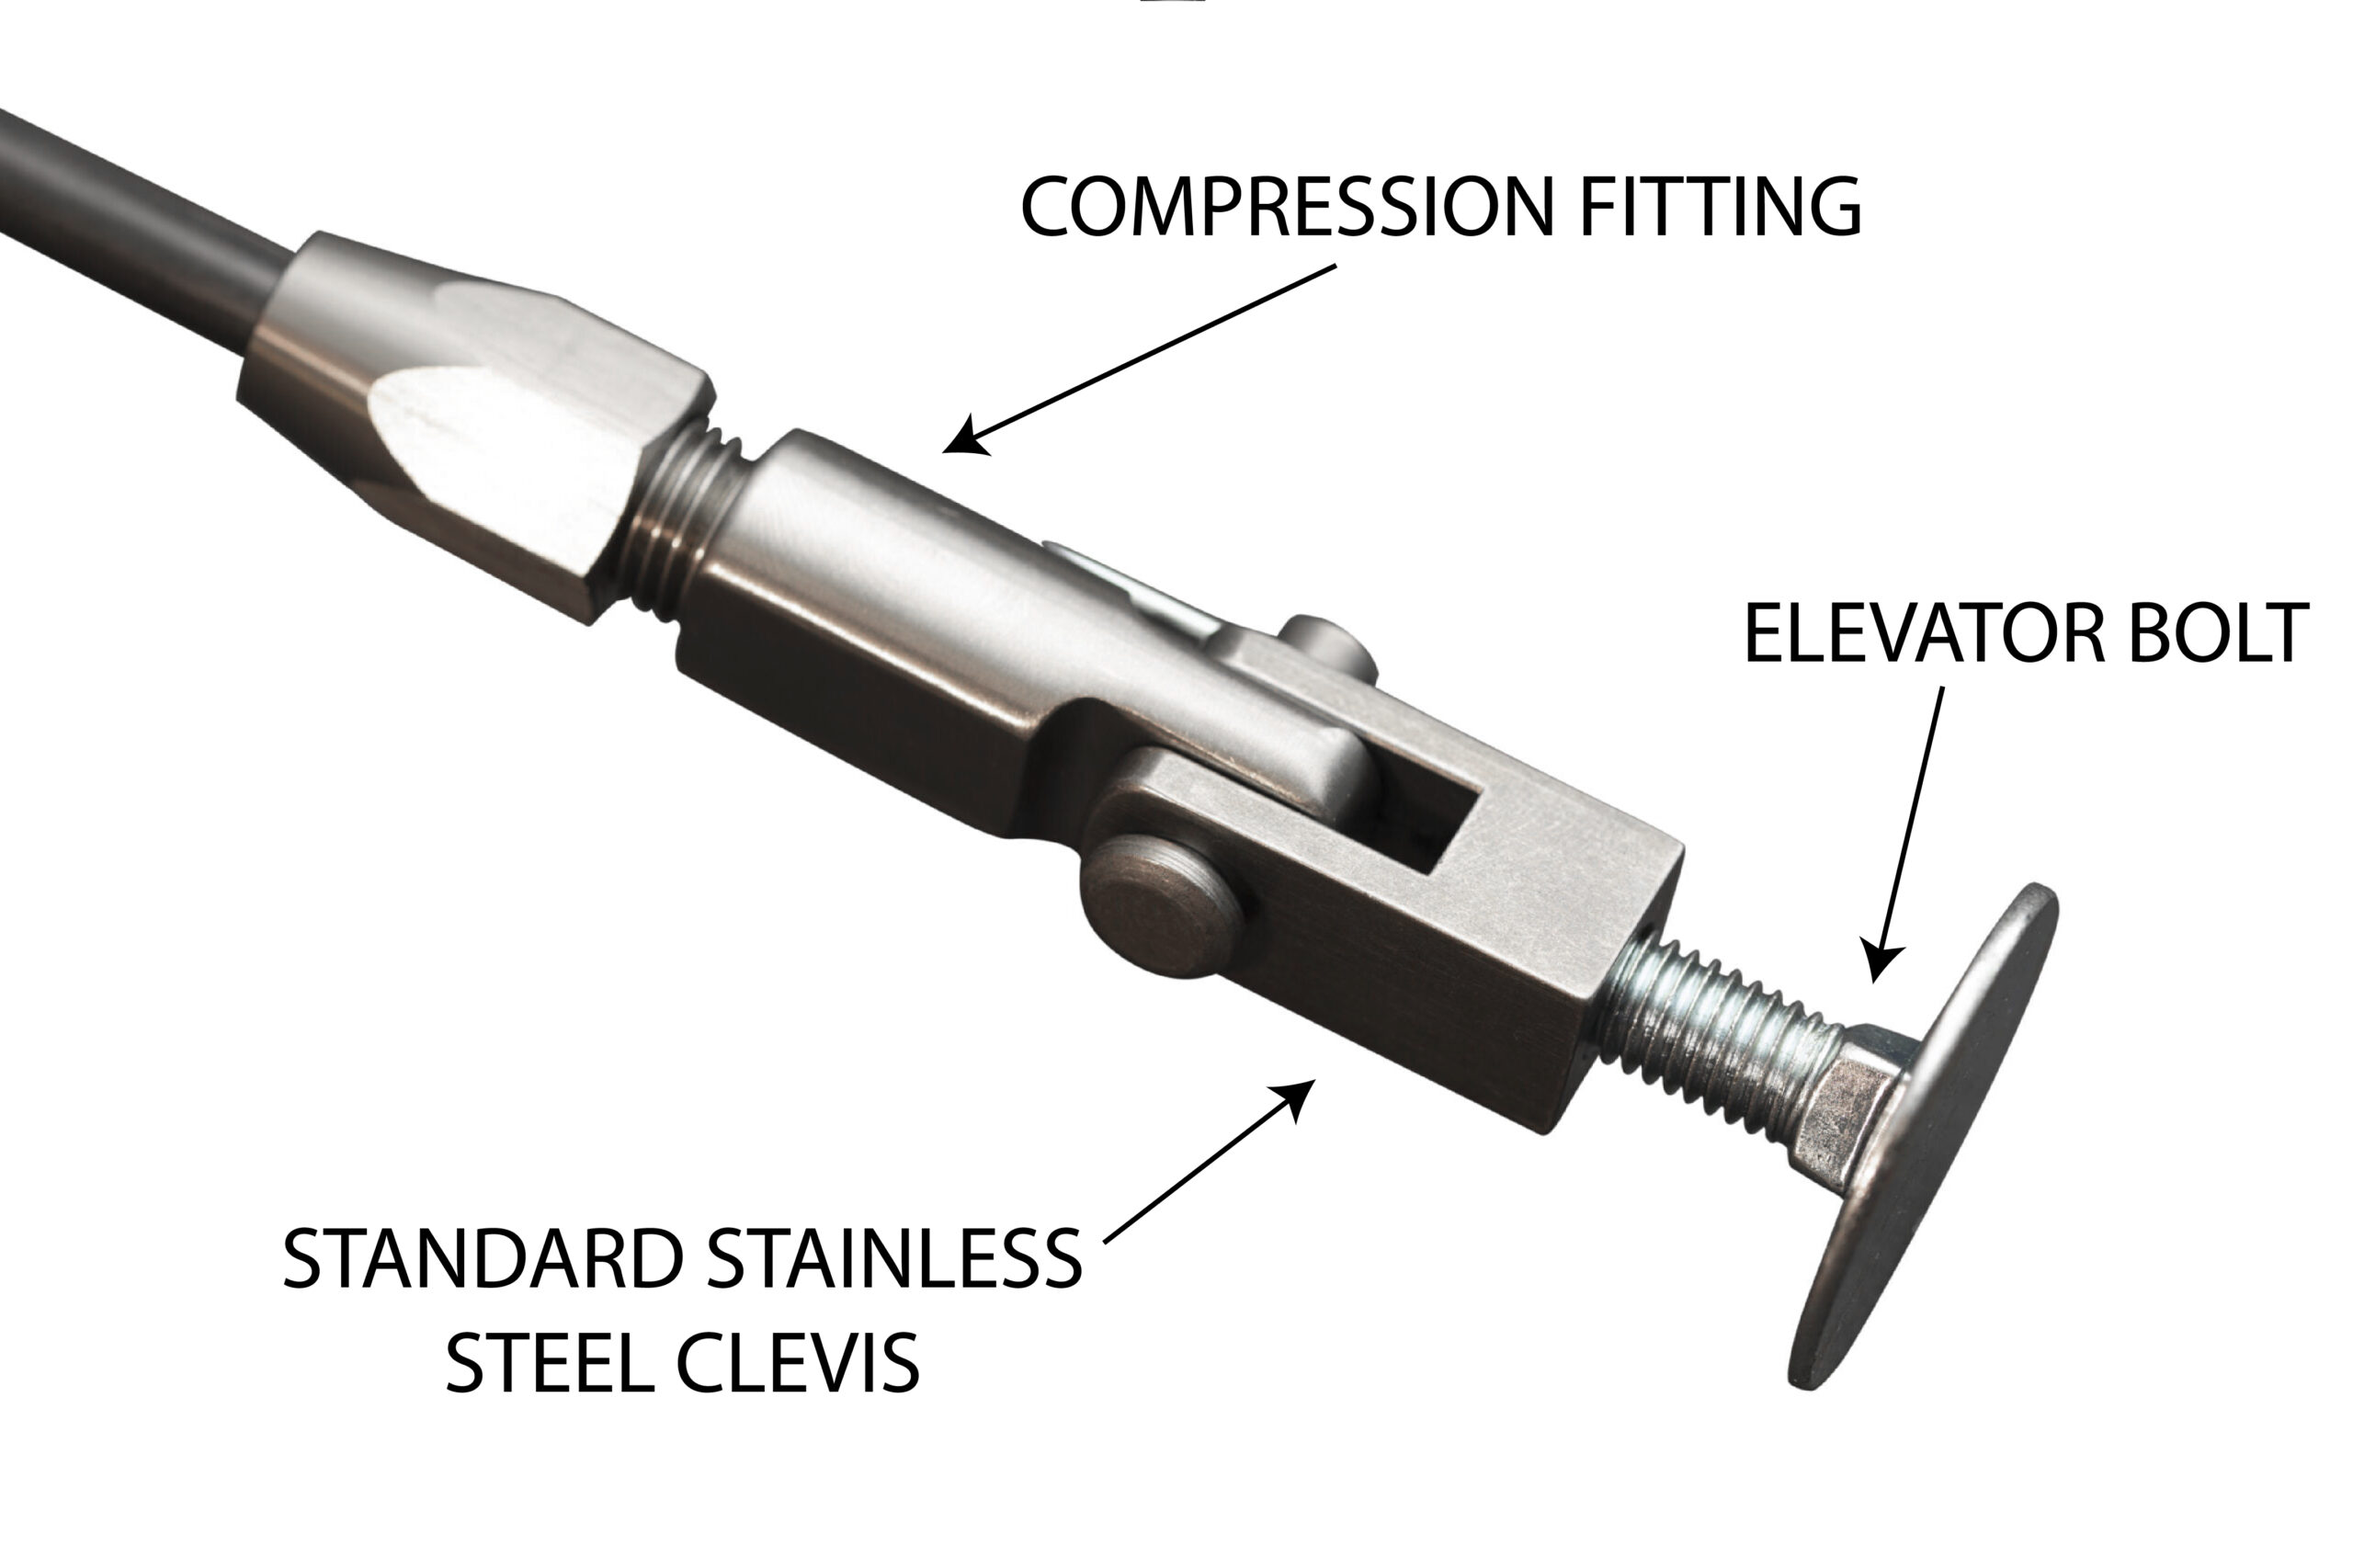
Custom stainless steel compression fittings let you cut the rods to the exact length your car requires. If a rod is damaged, you can replace it at the track with simple tools instead of replacing the complete support assembly. Replacement rods are available individually.
The Short Version
- High-tensile-strength fiber rods provide rigid support with controlled flexibility.
- Cut-to-length rods give you continuously adjustable working length within the selected range.
- Custom stainless steel compression fittings keep assembly and trackside rod replacement straightforward.
- Reusable clevises, pins, clips, and compression fittings mean you replace only what is damaged or what needs to change.
- Multiple clevis finishes and lower mounting methods let you match the system to your splitter material, visibility needs, and budget.
How the Splitter Support Rod System Goes Together
The option names make much more sense once you can picture the complete connection. Starting at the car and working down toward the splitter blade, here is the path the load follows.
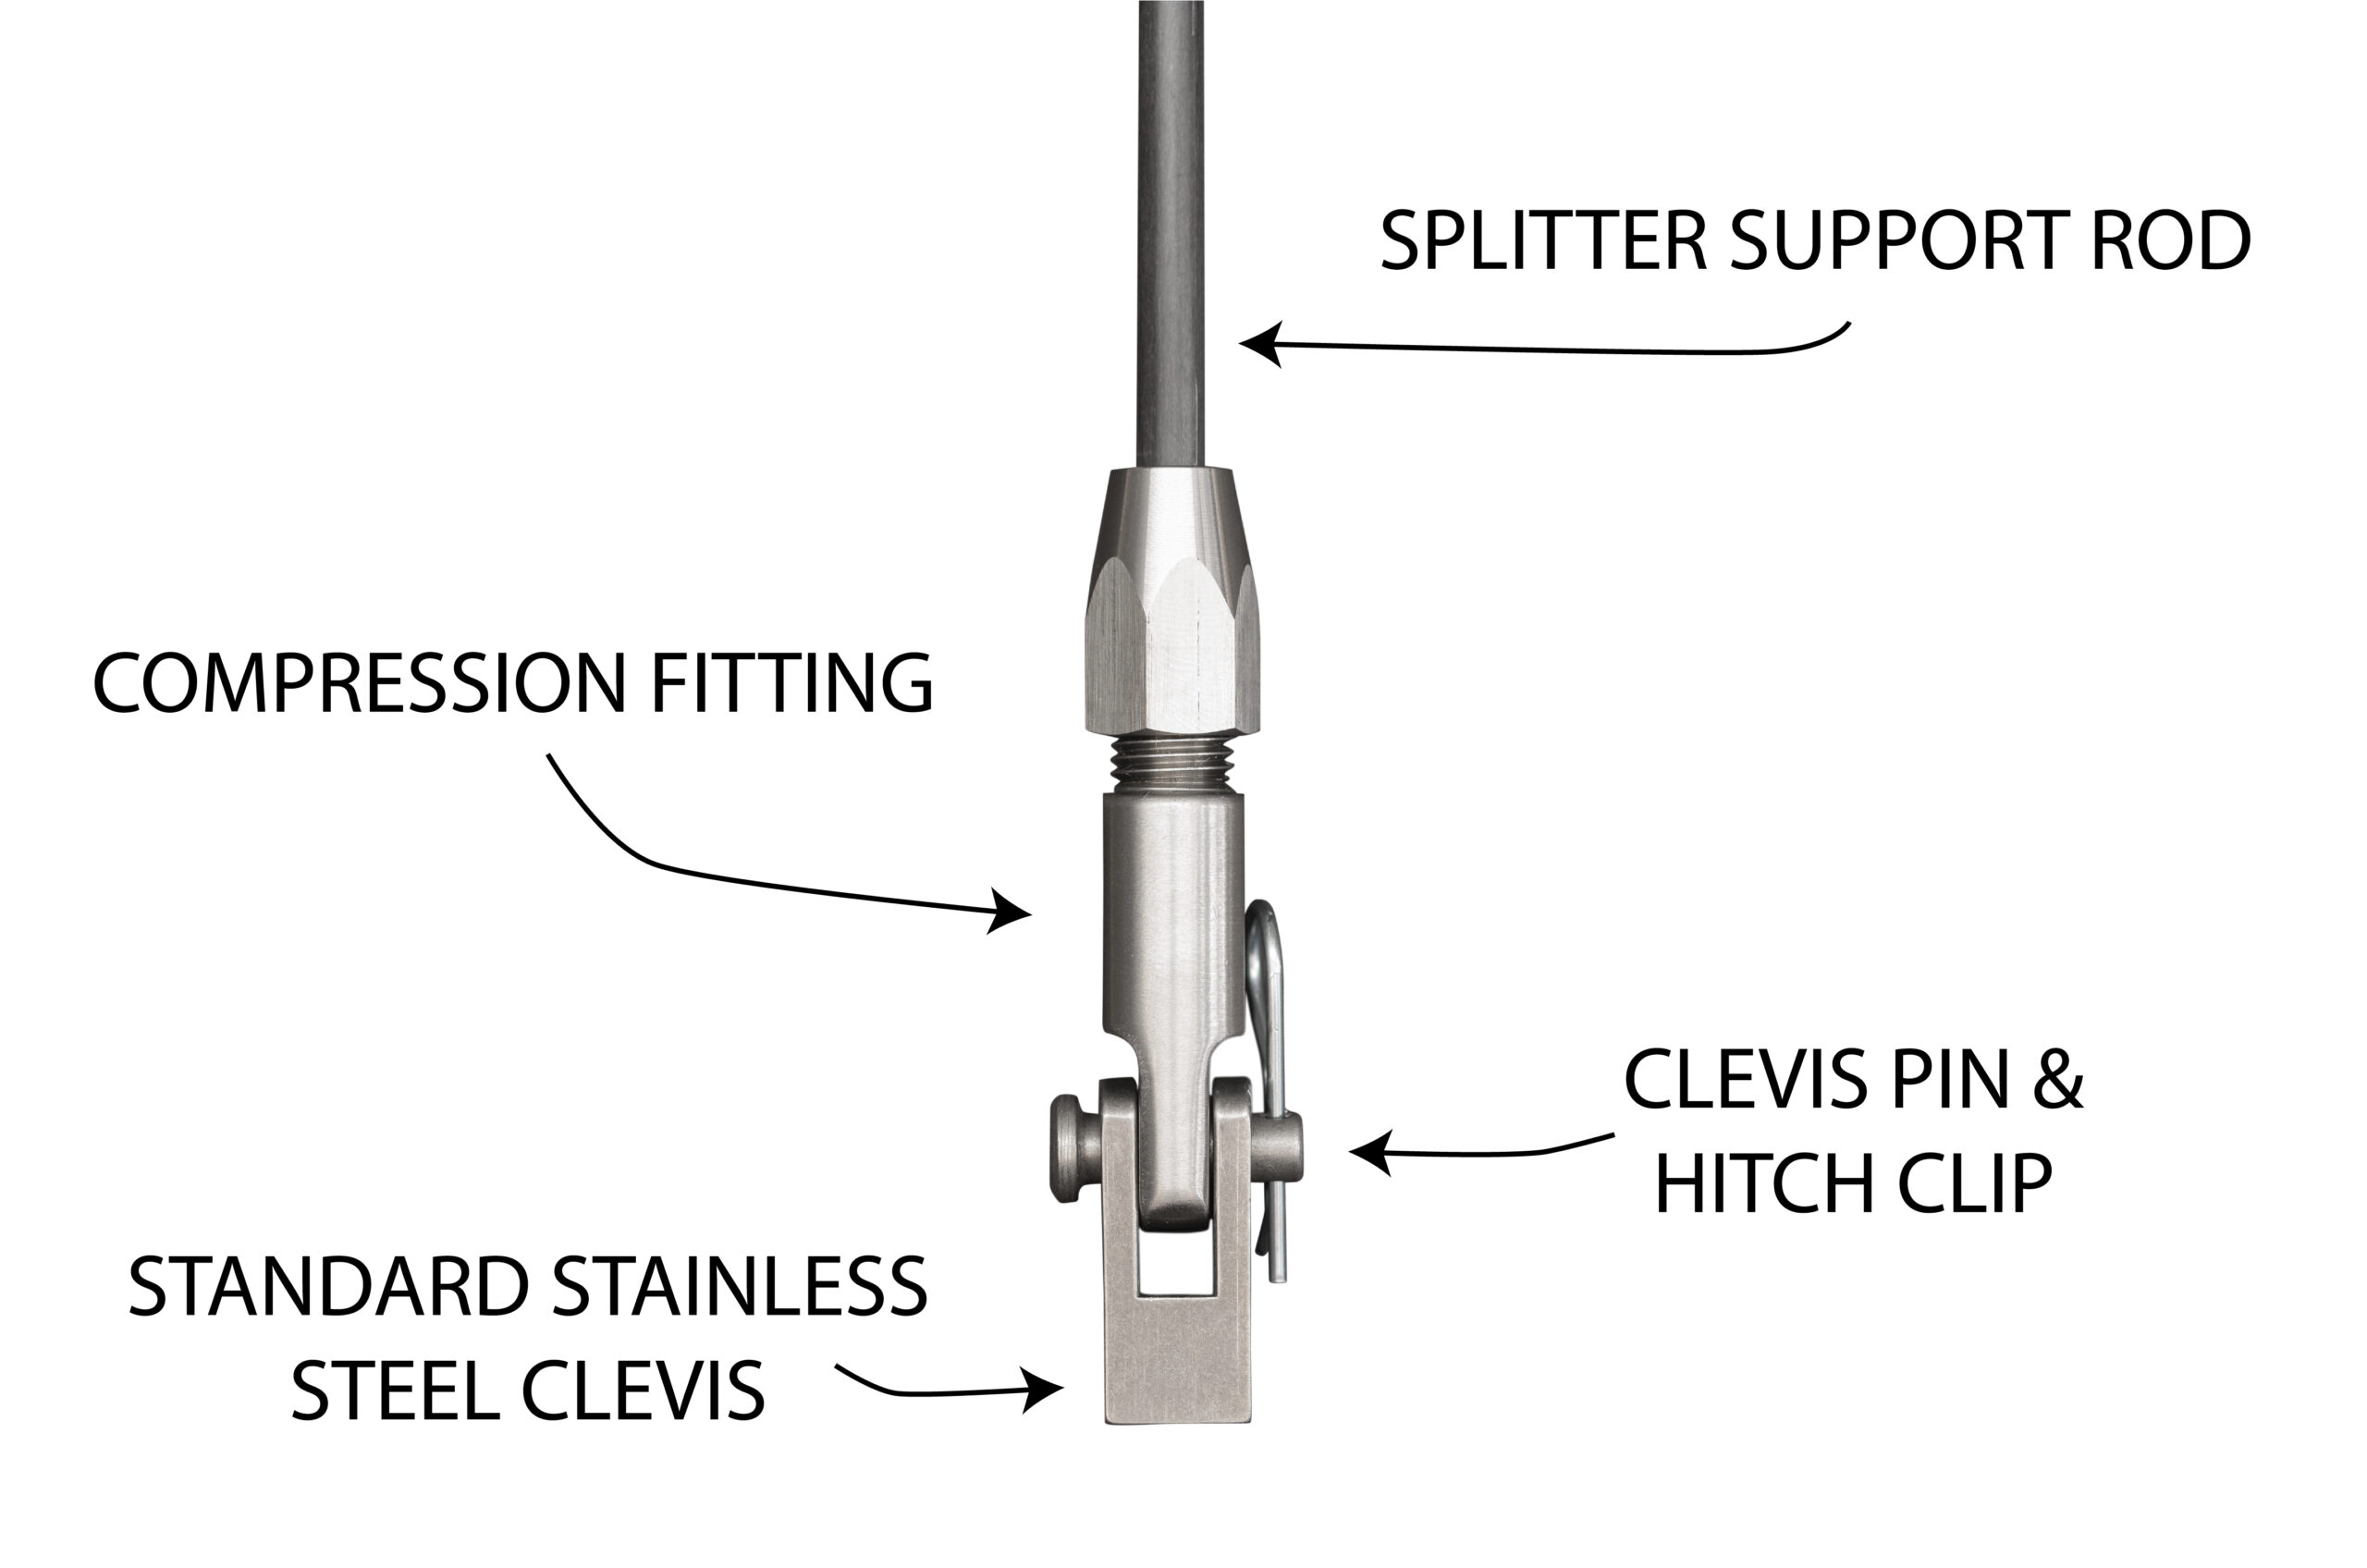
- Start at the chassis: The top clevis mounts to a suitable chassis location with hardware you select. The thread is M8-1.25, but the required fastener length and mounting arrangement depend on your car. That is why upper mounting hardware is not included.
- Connect each clevis: At both ends of the assembly, a clevis pin connects the clevis to the compression fitting. A hitch clip keeps each pin in place.
- Add the rod: The reinforced fiber rod connects the upper and lower compression fittings. Cut it to the working length your installation needs, then tighten the fittings to clamp it securely.
- Finish at the splitter blade: The bottom clevis attaches to the splitter with an elevator bolt, a titanium puck, or suitable customer-supplied M8-1.25 hardware. Choose one method at each lower mounting point.
Choose Your Configuration
Your configuration comes down to three choices: rod length, clevis finish, and how the bottom clevis attaches to the splitter.
1. Start With the Rod Length
Grab a tape measure before choosing. With the vehicle safely supported and the splitter in its installed position, measure between the planned upper and lower mounting points. Choose the shortest rod option whose working range covers that distance, unless you intentionally want a longer rod so the leftover material can be prepared as replacement rods for the track. Each order includes two rods.
| Rod option | Working distance | When to choose it |
|---|---|---|
| 18-inch | 4 to 20 inches | Choose this when it covers your measured distance and you do not need extra rod material. |
| 36-inch | 4 to 38 inches | Choose this for a longer installation or when you intentionally want extra material for replacement rods. |
| 48-inch | 4 to 40 inches | Choose this for the longest supported working distances or the greatest amount of extra replacement material. |
2. Pick the Clevis Finish
Mechanically, all of the clevis options do the same job. They use M8-1.25 threads and are completely interchangeable, so this decision is mostly about finish, visibility, and budget. Standard stainless steel clevises prioritize value. Fancy Aluminum clevises provide the cosmetic upgrade.
If your upper mounts are hidden behind the bumper, standard clevises at the top and aluminum at the bottom can give you the visible finish without making you pay for aluminum where nobody will see it.
3. Decide How the Bottom Clevis Attaches to the Splitter
This selector controls only the bottom clevis-to-splitter connection; it does not select chassis hardware. Choose one of four mutually exclusive paths: 20 mm elevator bolts, 25 mm elevator bolts, titanium skid pucks, or no lower attachment hardware when providing your own M8-1.25 fasteners.
Elevator Bolts
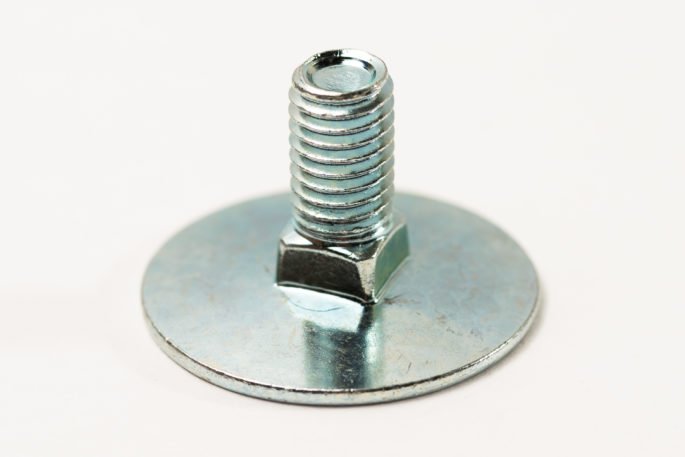
Building a plywood splitter? Elevator bolts are usually the simplest option. Their wide, flat heads compress slightly into the wood so they can sit flush and resist turning. Use care with Alumalite to avoid crushing the material. Elevator bolts are not recommended for most carbon fiber splitters.
- 20 mm bolt: for splitter thicknesses from 6 to 13 mm
- 25 mm bolt: for splitter thicknesses from 14 to 19 mm
These bolt-length recommendations apply only to this Splitter Support Rod kit.

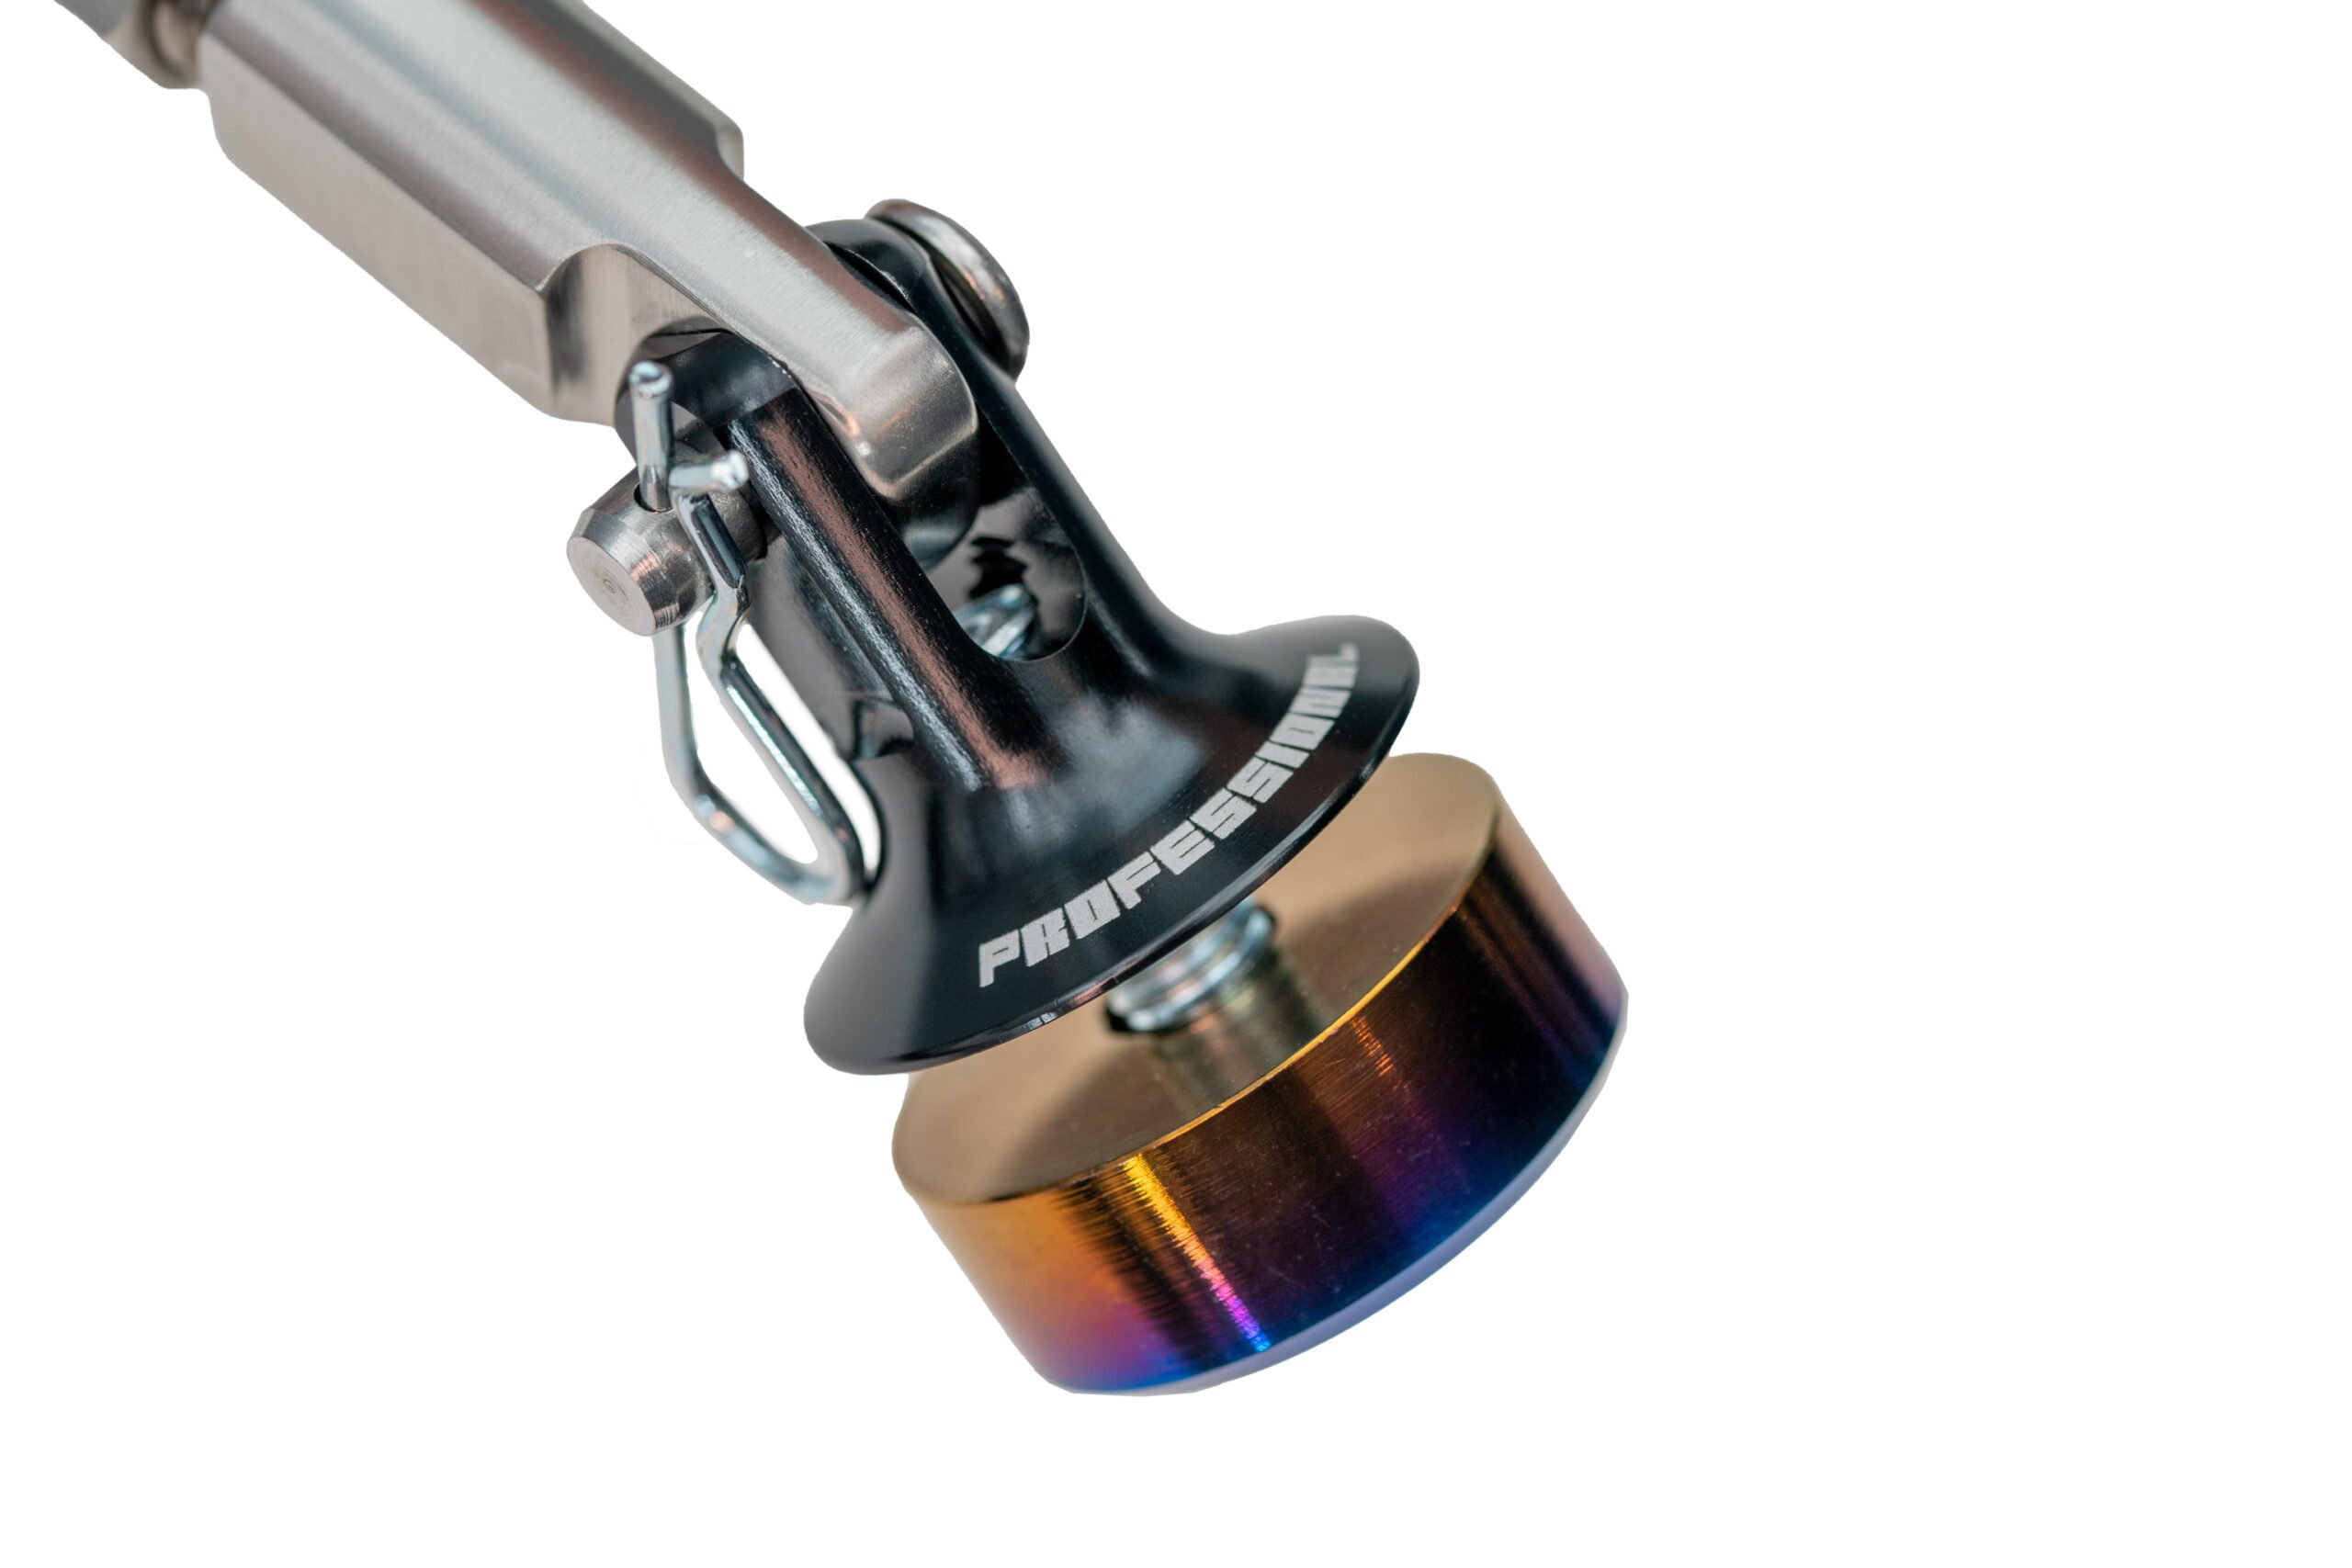
Titanium Pucks

If protecting the bottom of the blade matters more than keeping the mounting method simple, choose titanium pucks. They screw directly into the bottom clevises and sandwich the splitter blade. They can also simplify installation when carbon honeycomb or Alumalite is not well suited to an elevator bolt. Every titanium-puck configuration includes two M8-1.25 flat-head screws in both 25 mm and 30 mm lengths. The 25 mm screws keep the hardware shorter when the blade allows it; the 30 mm screws are included because the 25 mm fasteners have a limited splitter-thickness range. Use one screw length per puck, choosing the length that provides adequate thread engagement without bottoming in the clevis.
- Protect the bottom of the splitter from ground wear.
- Help prevent the splitter from sealing against the track surface and restricting underbody airflow.
- Can be replaced independently when worn.
No Lower Attachment Hardware
Choose No Lower Attachment Hardware if you already have a mounting method or need specialized fasteners. The bottom clevis uses M8-1.25 threads. Select customer-supplied hardware appropriate for the splitter material, thickness, expected load, required thread engagement, and ground clearance.
What Is Included
Here is what will arrive with every pair:
- 2 reinforced fiber rods in your selected length
- 4 stainless steel compression fittings with rod ends
- 4 M8-1.25 clevises in your selected configuration
- 4 clevis pins
- 4 hitch clips
For the lower splitter connection, choose one of these paths:
- 2 M8 elevator bolts, or
- 2 Titanium Splitter Support Pucks with 2 each of the 25 mm and 30 mm M8-1.25 flat-head screws, or
- No lower hardware if you plan to provide your own M8-1.25 fasteners
Not included: Upper chassis mounting hardware. You must select M8-1.25 hardware appropriate for your vehicle, mounting structure, and material thickness.
Installing and Inspecting the System
The hardware is straightforward, but this is still part of a loaded aerodynamic system. Take your time, dry-fit everything before cutting, and make sure the load enters a real chassis structure rather than a cosmetic panel.
- Identify structurally appropriate upper chassis mounting locations.
- Dry-assemble the clevises, pins, clips, and compression fittings. With the splitter in its installed position, measure twice before cutting the rods.
- Cut both rods to the required length. A high-speed abrasive wheel is recommended. Use suitable personal protective equipment and control cutting dust.
- Insert each rod fully into its compression fittings. Use a crowfoot wrench to torque each compression fitting to 20 to 22 lb-ft.
- Attach the bottom clevises using the selected elevator bolts, titanium pucks, or customer-supplied M8-1.25 hardware. Titanium-puck kits include both 25 mm and 30 mm flat-head screws; use only the length that provides adequate thread engagement without bottoming in the clevis. Confirm that the splitter material is not crushed or locally overstressed.
- Verify that every clevis pin is retained by a hitch clip. Confirm that the rods are not side-loaded, pre-bent, or contacting nearby bodywork.
- Inspect the complete system regularly and after any impact or off-track event. Replace damaged or heavily worn components before returning to the track.
A final safety note: Chassis attachment, splitter stiffness, installation quality, vehicle speed, and total aerodynamic load all affect how this system performs. If you are uncertain about the mounting structure or hardware selection, contact Professional Awesome with measurements and clear photos before installation. We would rather help you choose correctly than sell you something you do not need.
Prefer to Watch? Start Here
These videos walk through the support rod design, installation, and removal. Watch the product overview first, then move to the installation videos when you are ready to work on the car.
Support Rod Design and Product Overview
Splitter Support Rods and Quick Release Kit Installation
Splitter Support Rods and Quick Release Kit Removal

Dusty –
We use these on our race car and even after one or two front collisions, the splitter rods still hold. We like the adjustability of the rod lengths as well.
Dan Foley –
These splitter rods are exactly what I was looking for! Extremely adjustible and durable. They have enough flex to keep from destroying the splitter when it hits the ground while holding it securely in place
Richard Moussa (verified owner) –
Used a set of these splitter rods on my NB Miata. The rods installed in a few minutes and removed all splitter deflection. It was the perfect solution for my issue.
Alessandro –
Those rods are simply incredible. They survived to a 4 wheel off at the corkscrew on a Mustang, but they bent enough to allow me to keep attached the splitter for the following 4 sessions. I’m ordering some others right now as spare. Just trash the other rods and pick those.
Nick (verified owner) –
These splitter rods continue to impress. There really seems to be no downside/compromise to running them unlike cables(flapping around) or metal rods(bending). These splitter rods hold the aero exactly where it should be yet if you come in contact with something they’ve been extremely flexible but with no damage to the rods afterwards. I originally purchased 6 to use with their quick release mounts on my carbon splitter but have only needed 4 since they’ve been so strong. Very easy to cut to any length and adjustments are simple.
Sam Van Heest –
I’ve used a lot of different types of rods/rod ends on aero projects for customers cars and they all had drawbacks or limitations- until I found these. These are by far the best in every category. They are confidence inspiring (knowing your aero will absolutely stay where it should) and the flexibility that is designed into them allows for some deflection which is always bound to happen. Also, the quick release design and usability is fantastic- simple, well executed, and it just works. 11/10- I will be using these whenever I have the opportunity. Well done!
Grant –
I’ve had these support rods on my Integra for two years. They’ve survived numerous off-track excursions without batting an eye.
Note: splurge a bit on the ‘Fancy’ clevises. I went with the standard option, but have since upgraded. They provide a nice backing surface, meaning no awkward spacers are needed.
Masters of OutofSTock –
OUT OF STOCK…Whenever I want to buy a product, they are out of stock here forcing me to piece all the parts elsewhere
Daniel O’Donnell –
We’re doing our best to minimize out of stock items, I swear it!
Jacob (verified owner) –
I’ve run these for a few years on an Autocross CAMC car that drives to and from events with a splitter 3-4” off the pavement. I’ve smacked and scraped things a lot. These bend when they can and break when they have to but usually save the most difficult to replace hard parts from failing.
Kai (verified owner) –
I like how customizable the lengths can be. Minus one star because for the price it should include 2 more M8 bolts for the side that mounts to the chassis. It doesn’t have to be the fancy elevator bolt that they already offer, just regular ones that hides inside the chassis. You will have to source them yourselves.
Troy (verified owner) –
Wow – PERFECT!!! This is such a step up from the chinesium copies on Amazon Ebay Ali, etc… Hardware quality and fit is bang on, and the fiber tension rods are just what the doctor ordered, keeping things in place while allowing just enough flex. If you’re going all-out on a front splitter or rear diffuser don’t hesitate.